How to Create a Pull Request (PR) on GitHub
Learn how to create a Pull Request (PR) and try it yourself
Introduction
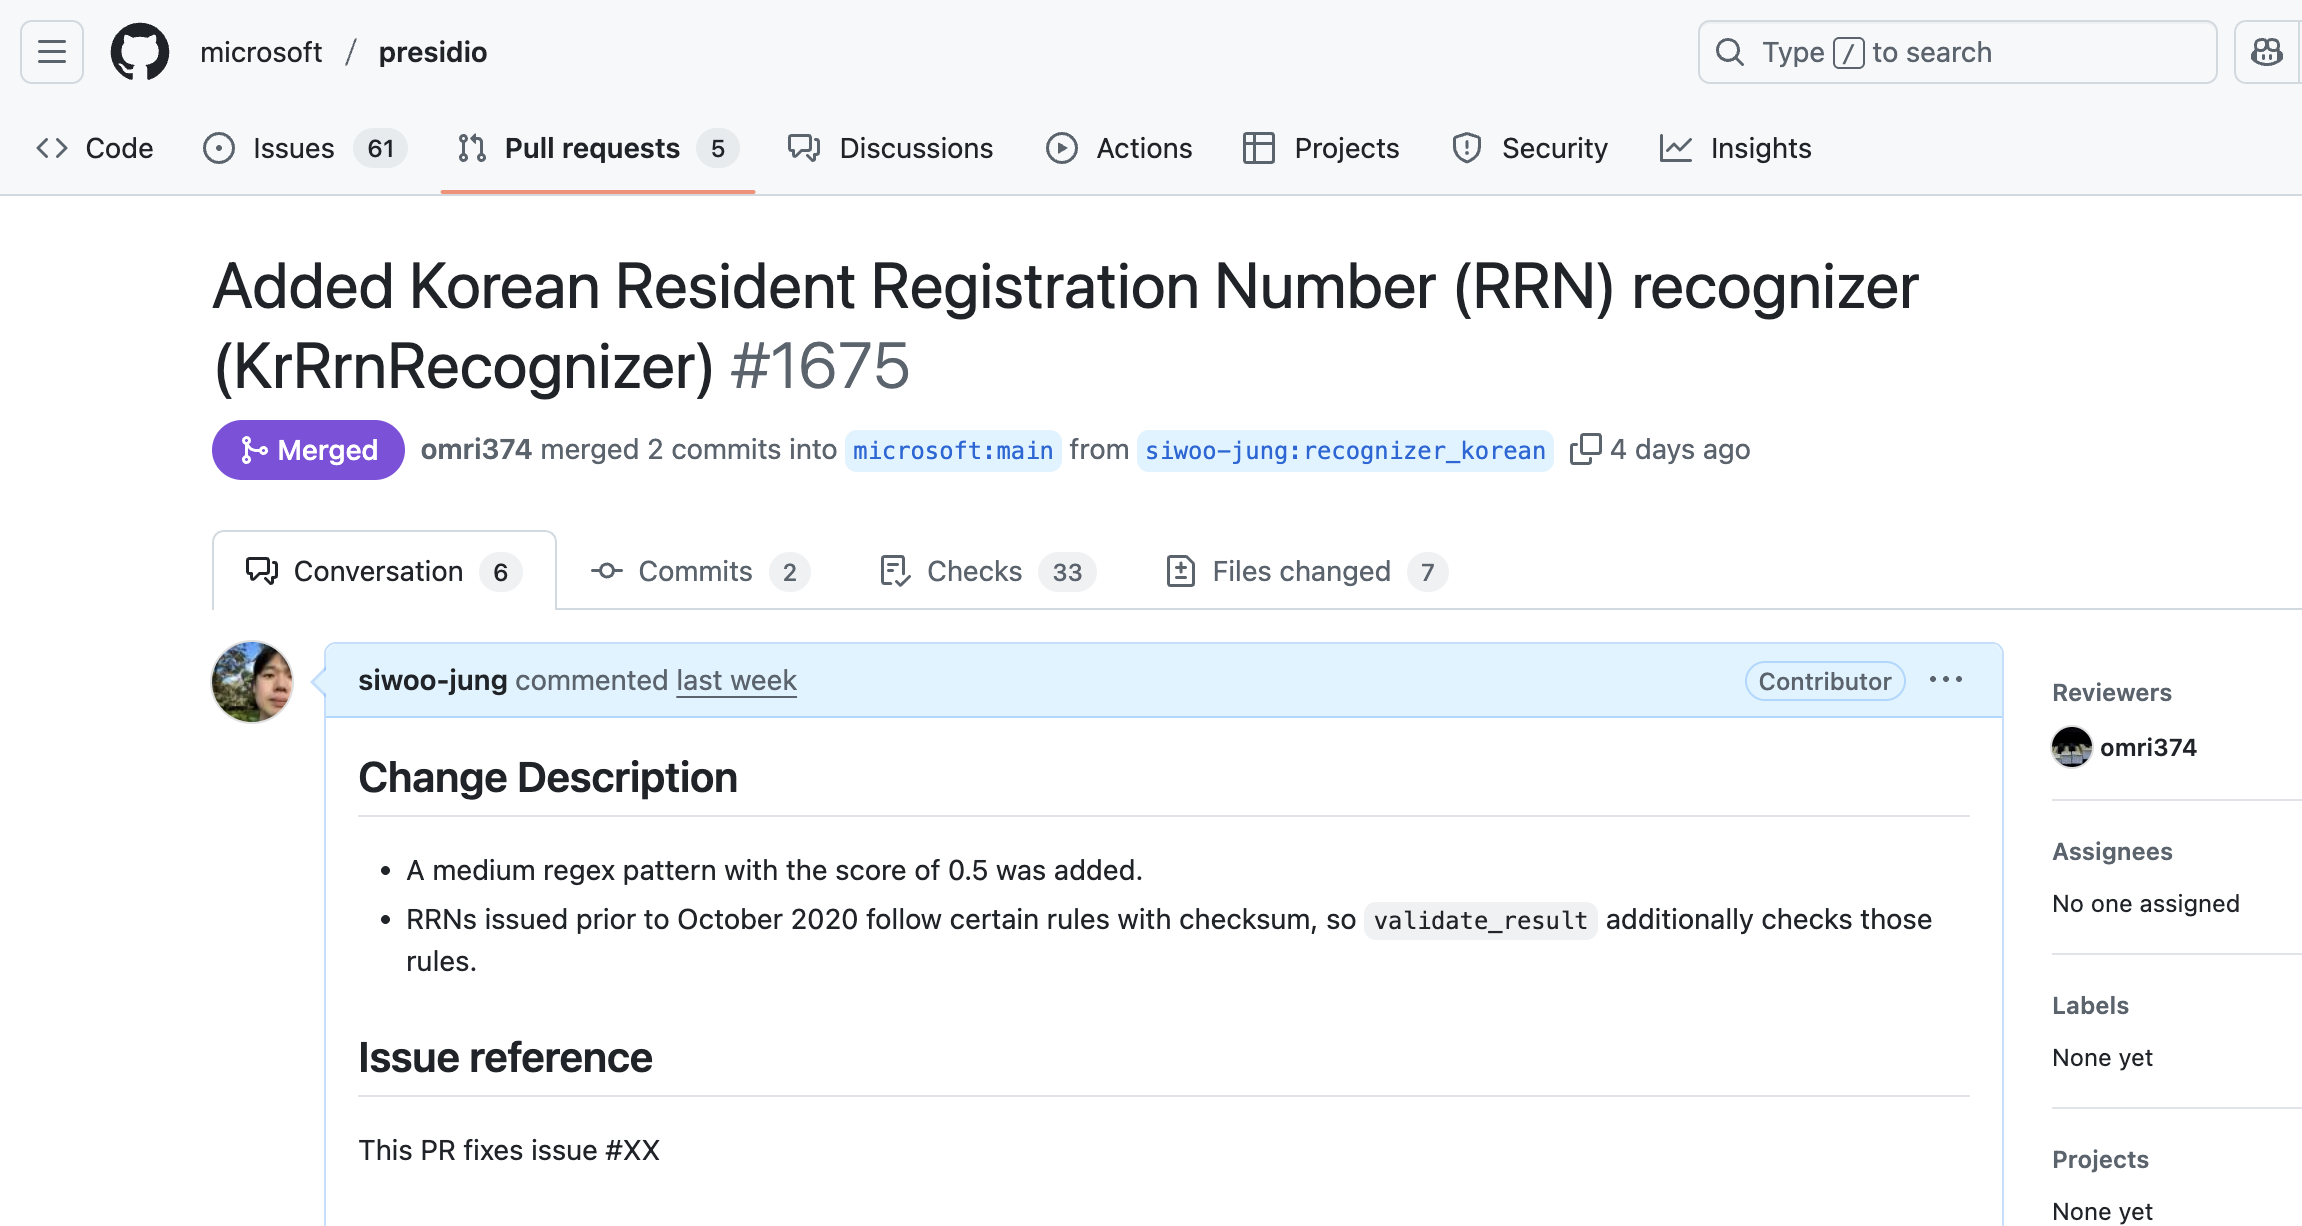
In my previous post, I shared my experience contributing to Microsoft’s open source project, Presidio. For those not familiar with creating a Pull Request (PR), this post will provide a step-by-step guide on how to create a PR on GitHub.
A Pull Request (PR) is a way to propose changes to a codebase. It’s called a “pull” request because you’re asking the project maintainers to “pull” your changes into their repository. PRs are fundamental to collaborative development and are the standard way to contribute to open source projects.
Prerequisites
Before you start creating PRs, make sure you have:
- Git installed on your computer
- Download Git from git-scm.com
- Verify installation by running
git --versionin your terminal
- A GitHub account
- Sign up at github.com
- Set up two-factor authentication (2FA) for security
- Configure your Git credentials locally:
1
2
git config --global user.name "Your Name"
git config --global user.email "your.email@example.com"
- Basic Git knowledge
- Understanding of basic Git commands (
clone,add,commit,push) - Familiarity with branching concepts
- Knowledge of what a repository is
- Understanding of basic Git commands (
- A code editor
- Visual Studio Code, Sublime Text, or any preferred editor
- Basic understanding of the programming language you’ll be working with
What You’ll Learn
By following this tutorial, you’ll learn how to:
- Fork a repository
- Clone a repository to your local machine
- Make changes to files
- Commit and push changes
- Create a pull request
- Understand the pull request workflow
How to Participate
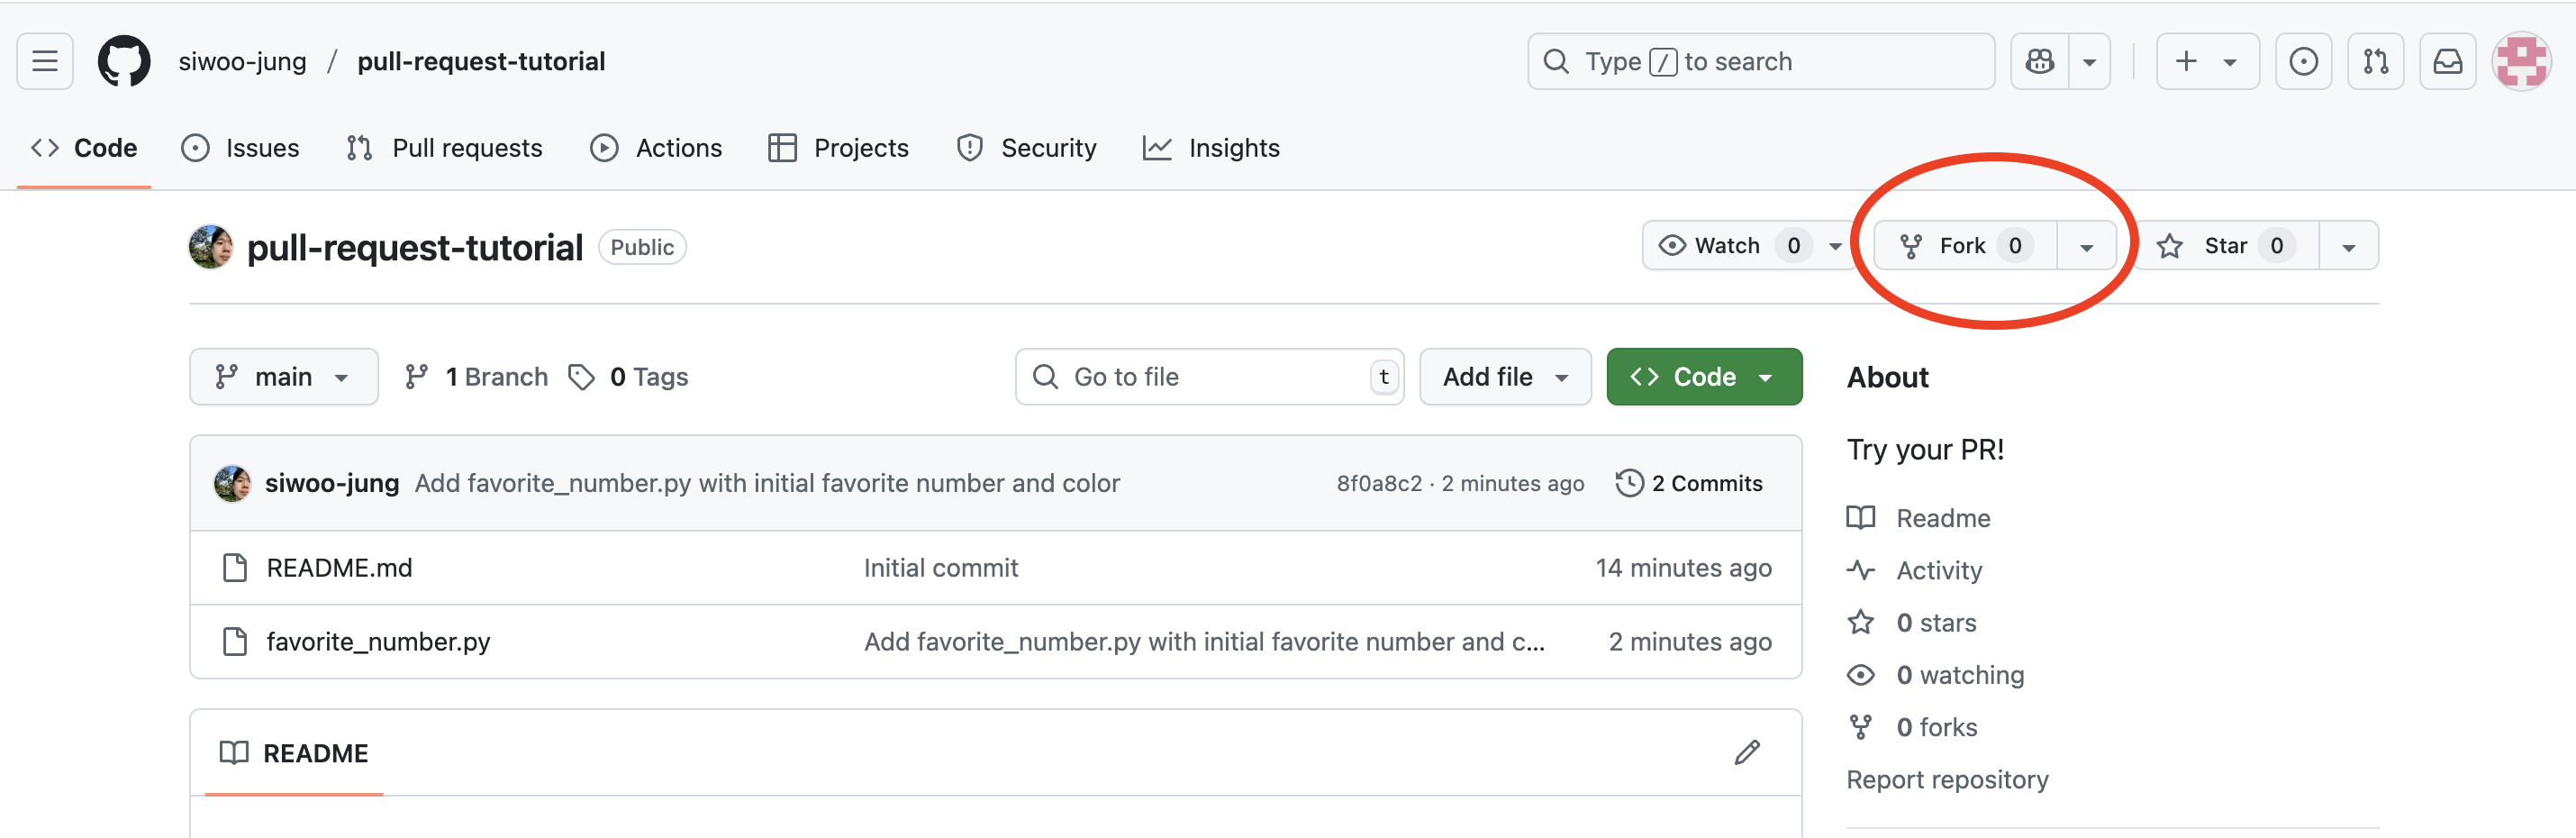
Step 1: Fork the Repository
- Go to my tutorial repository
- Navigate to the top right of the repository page
- Click the Fork button
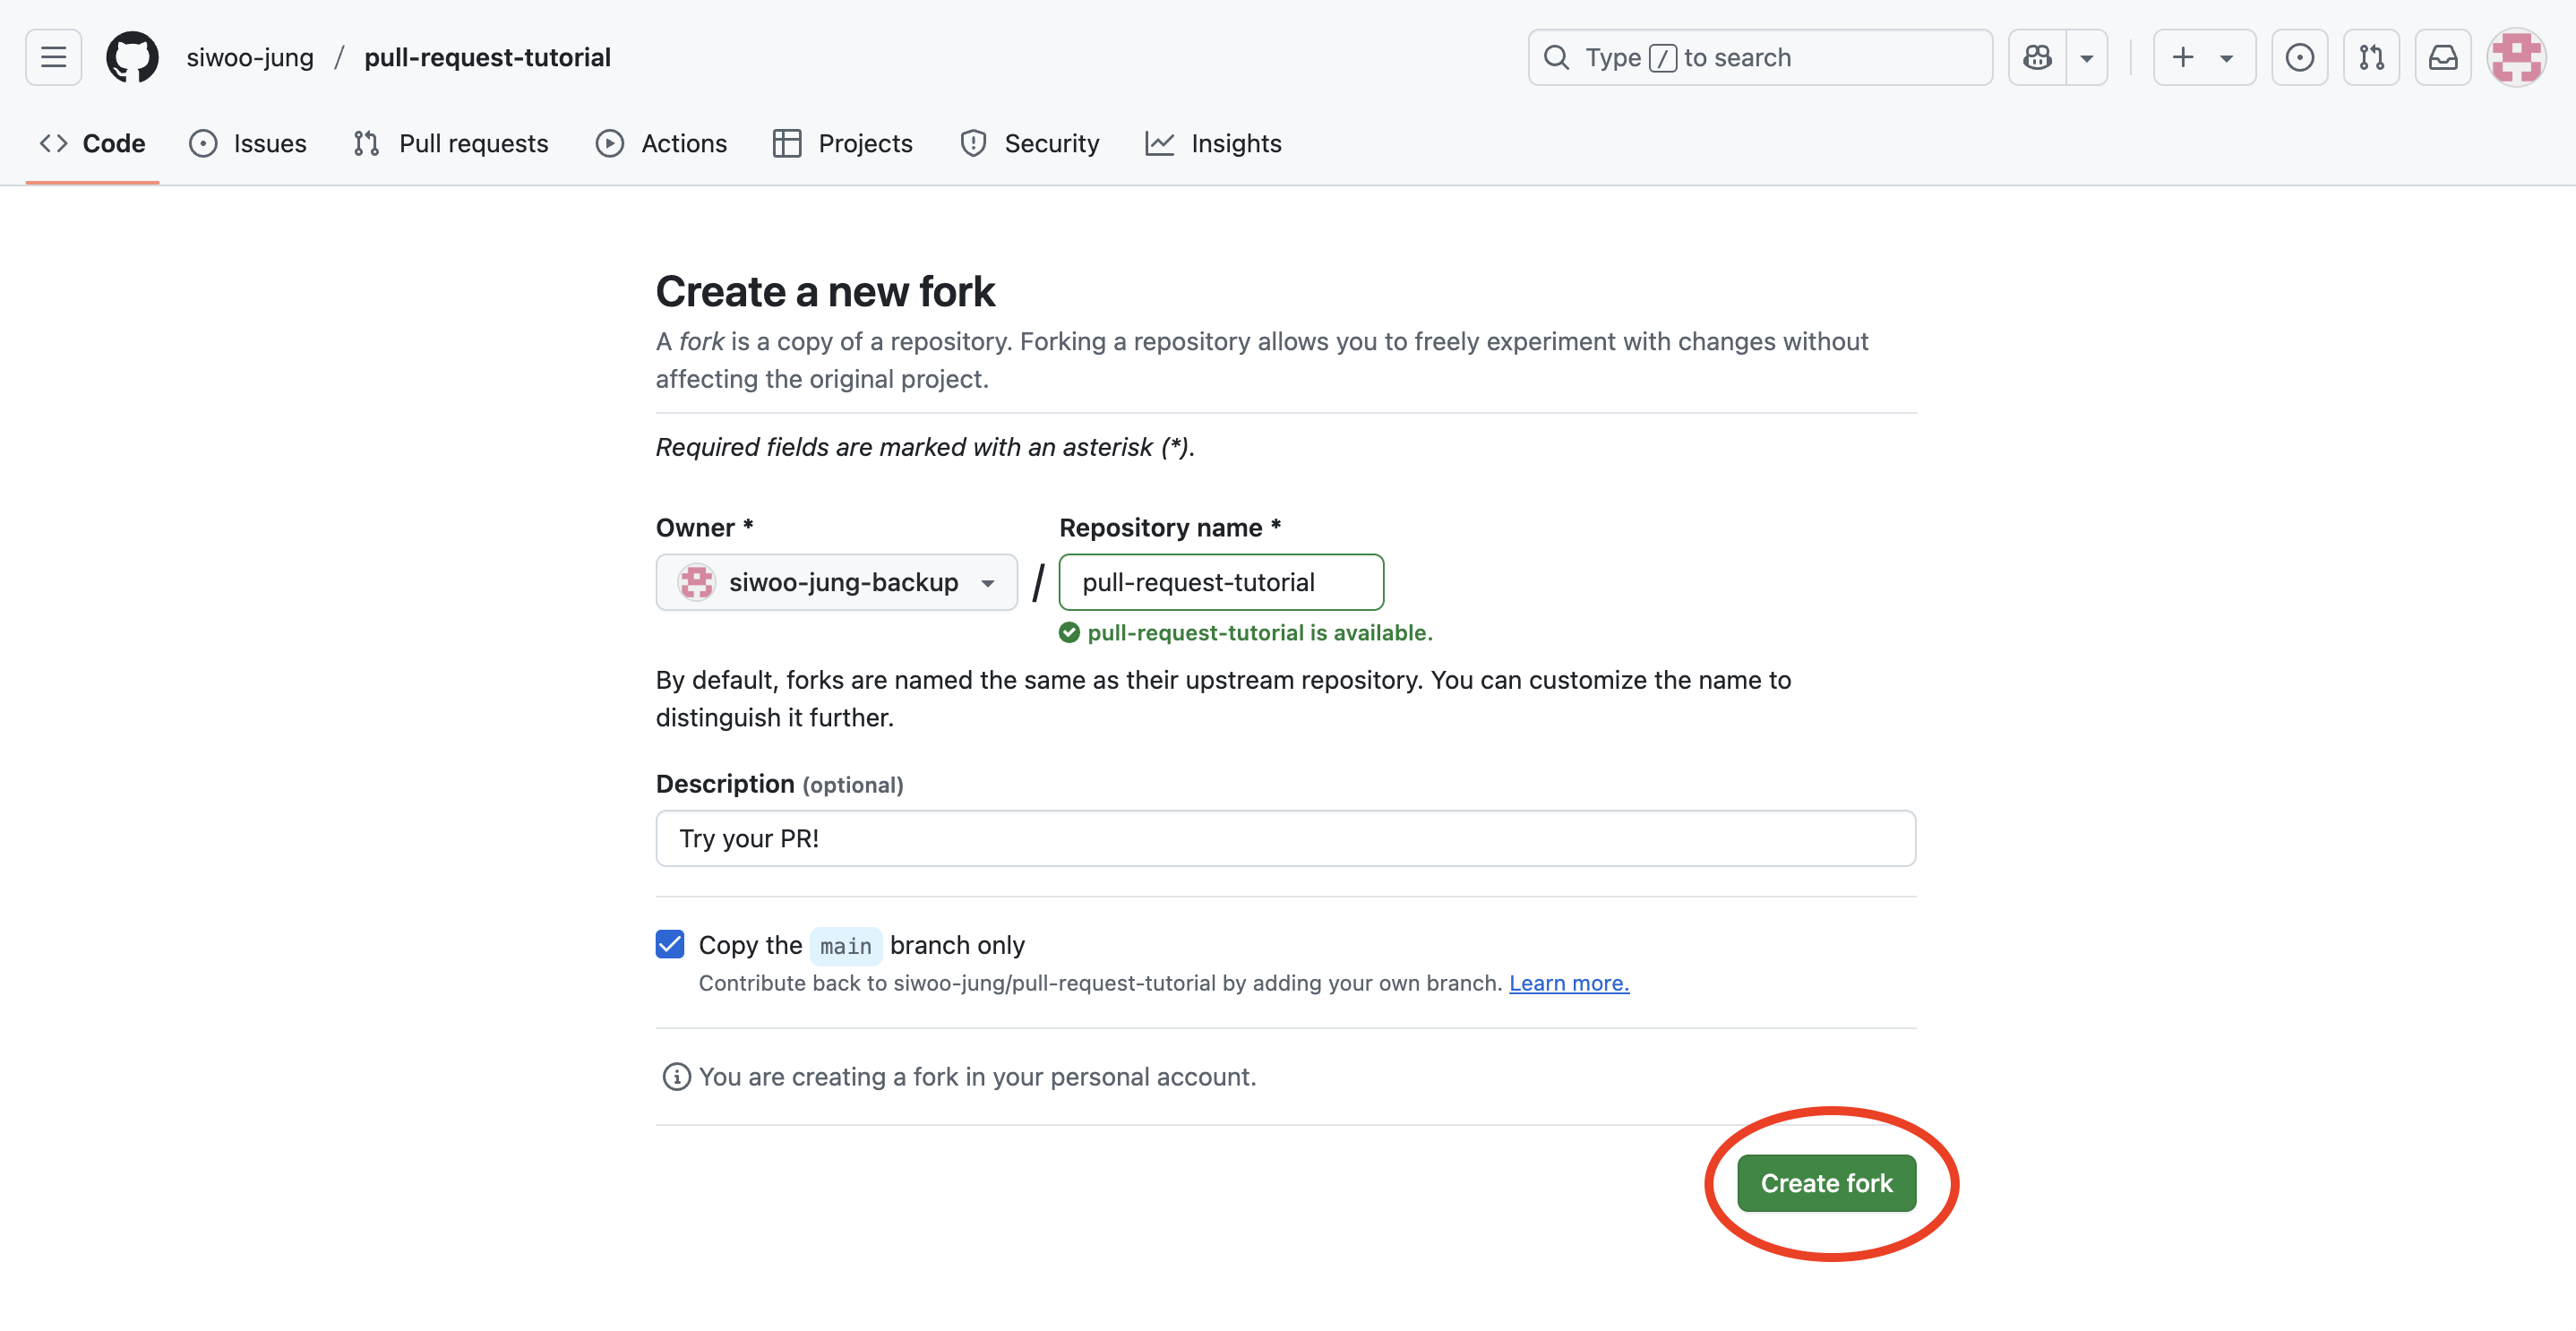
Click Create fork to fork this repository to your GitHub account
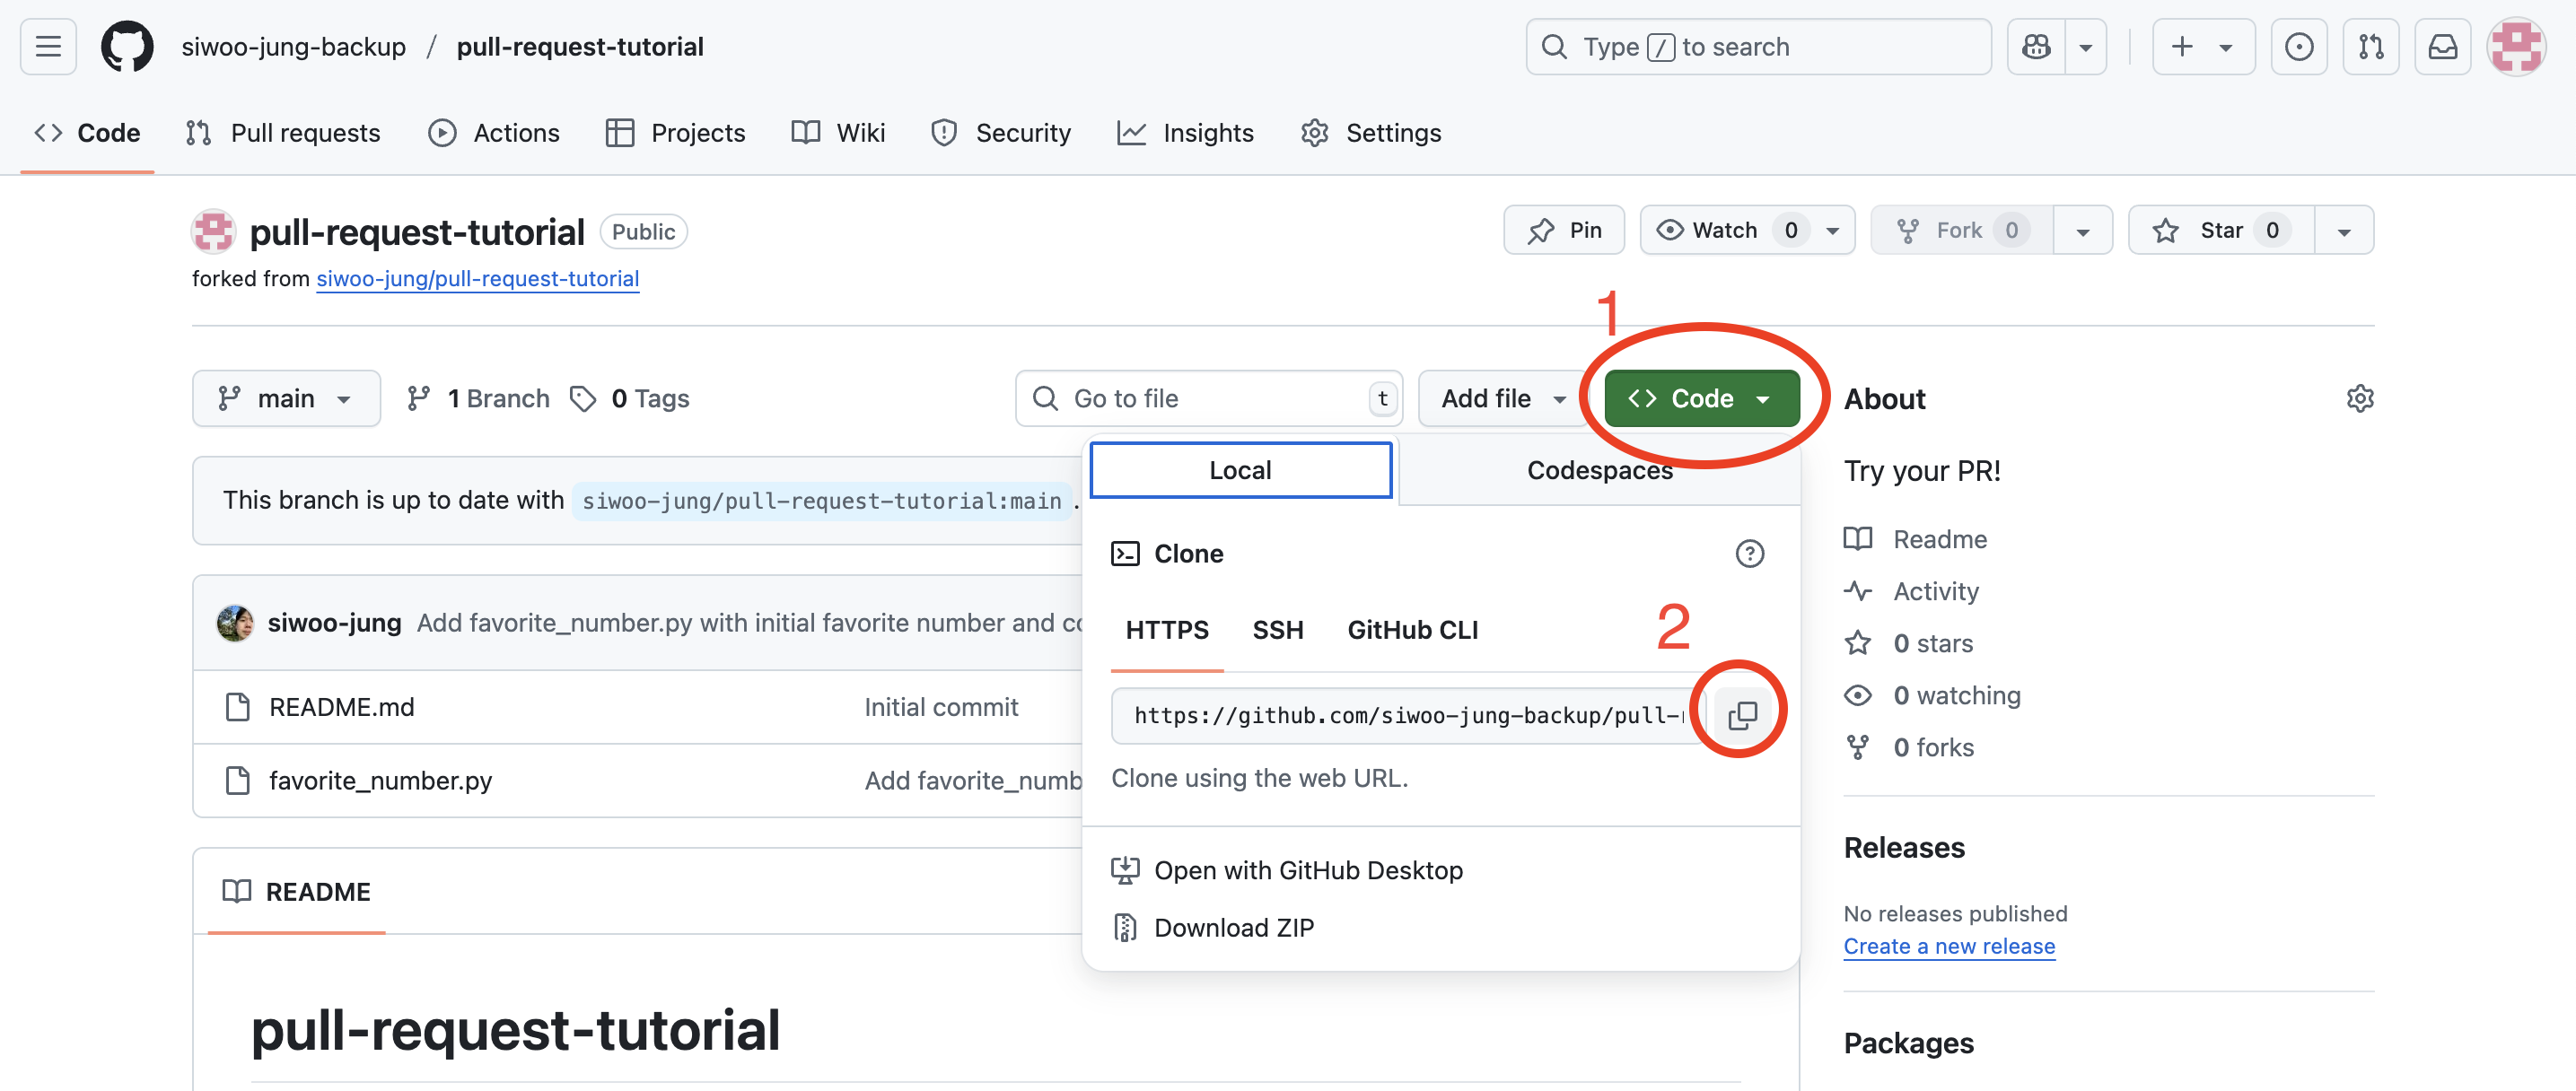
Step 2: Get Your Repository URL
- Click the <> Code button (green button)
Click the copy icon to copy your repository URL
Step 3: Clone the Repository
Open your terminal and run the following commands. Make sure to replace YOUR-USERNAME with your actual GitHub username, or use the copied URL from Step 2.
1
2
git clone https://github.com/YOUR-USERNAME/pull-request-tutorial.git
cd pull-request-tutorial
Step 4: Make Your Changes
- Open the
favorite_number.pyfile in your preferred text editor - Change the
favorite_numberandfavorite_colorvariables to your actual favorites Save the file

Step 5: Commit and Push Your Changes
Run these commands in your terminal:
1
2
3
git add favorite_number.py
git commit -m "Update favorite number and color"
git push origin main
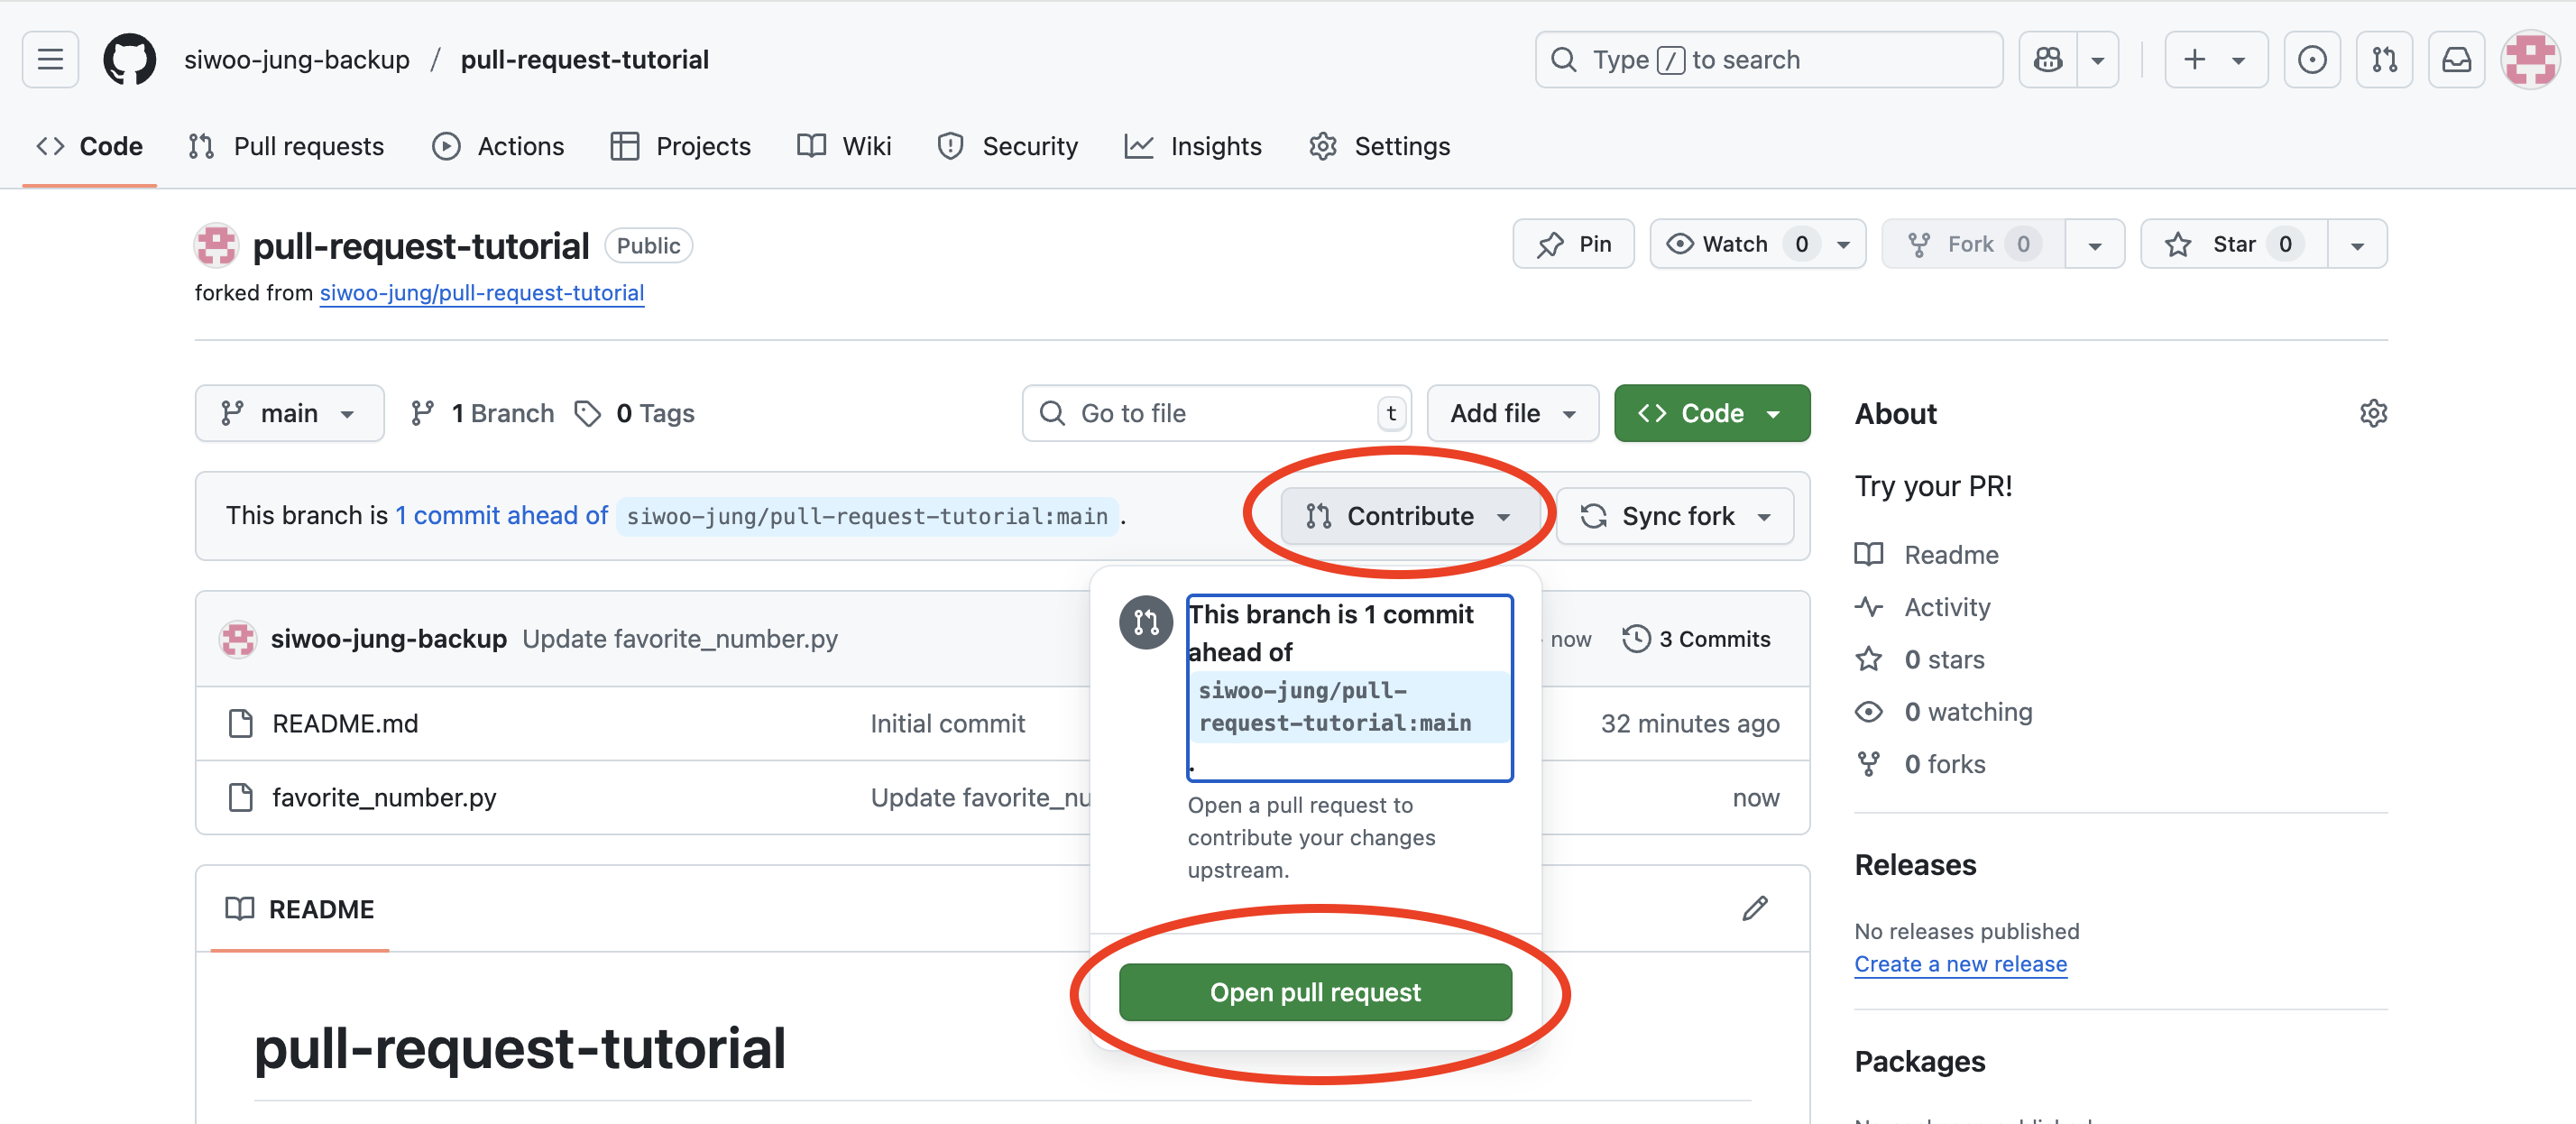
Step 6: Create a Pull Request
- Go to your forked repository on GitHub
- Click the Contribute button
Click Open pull request
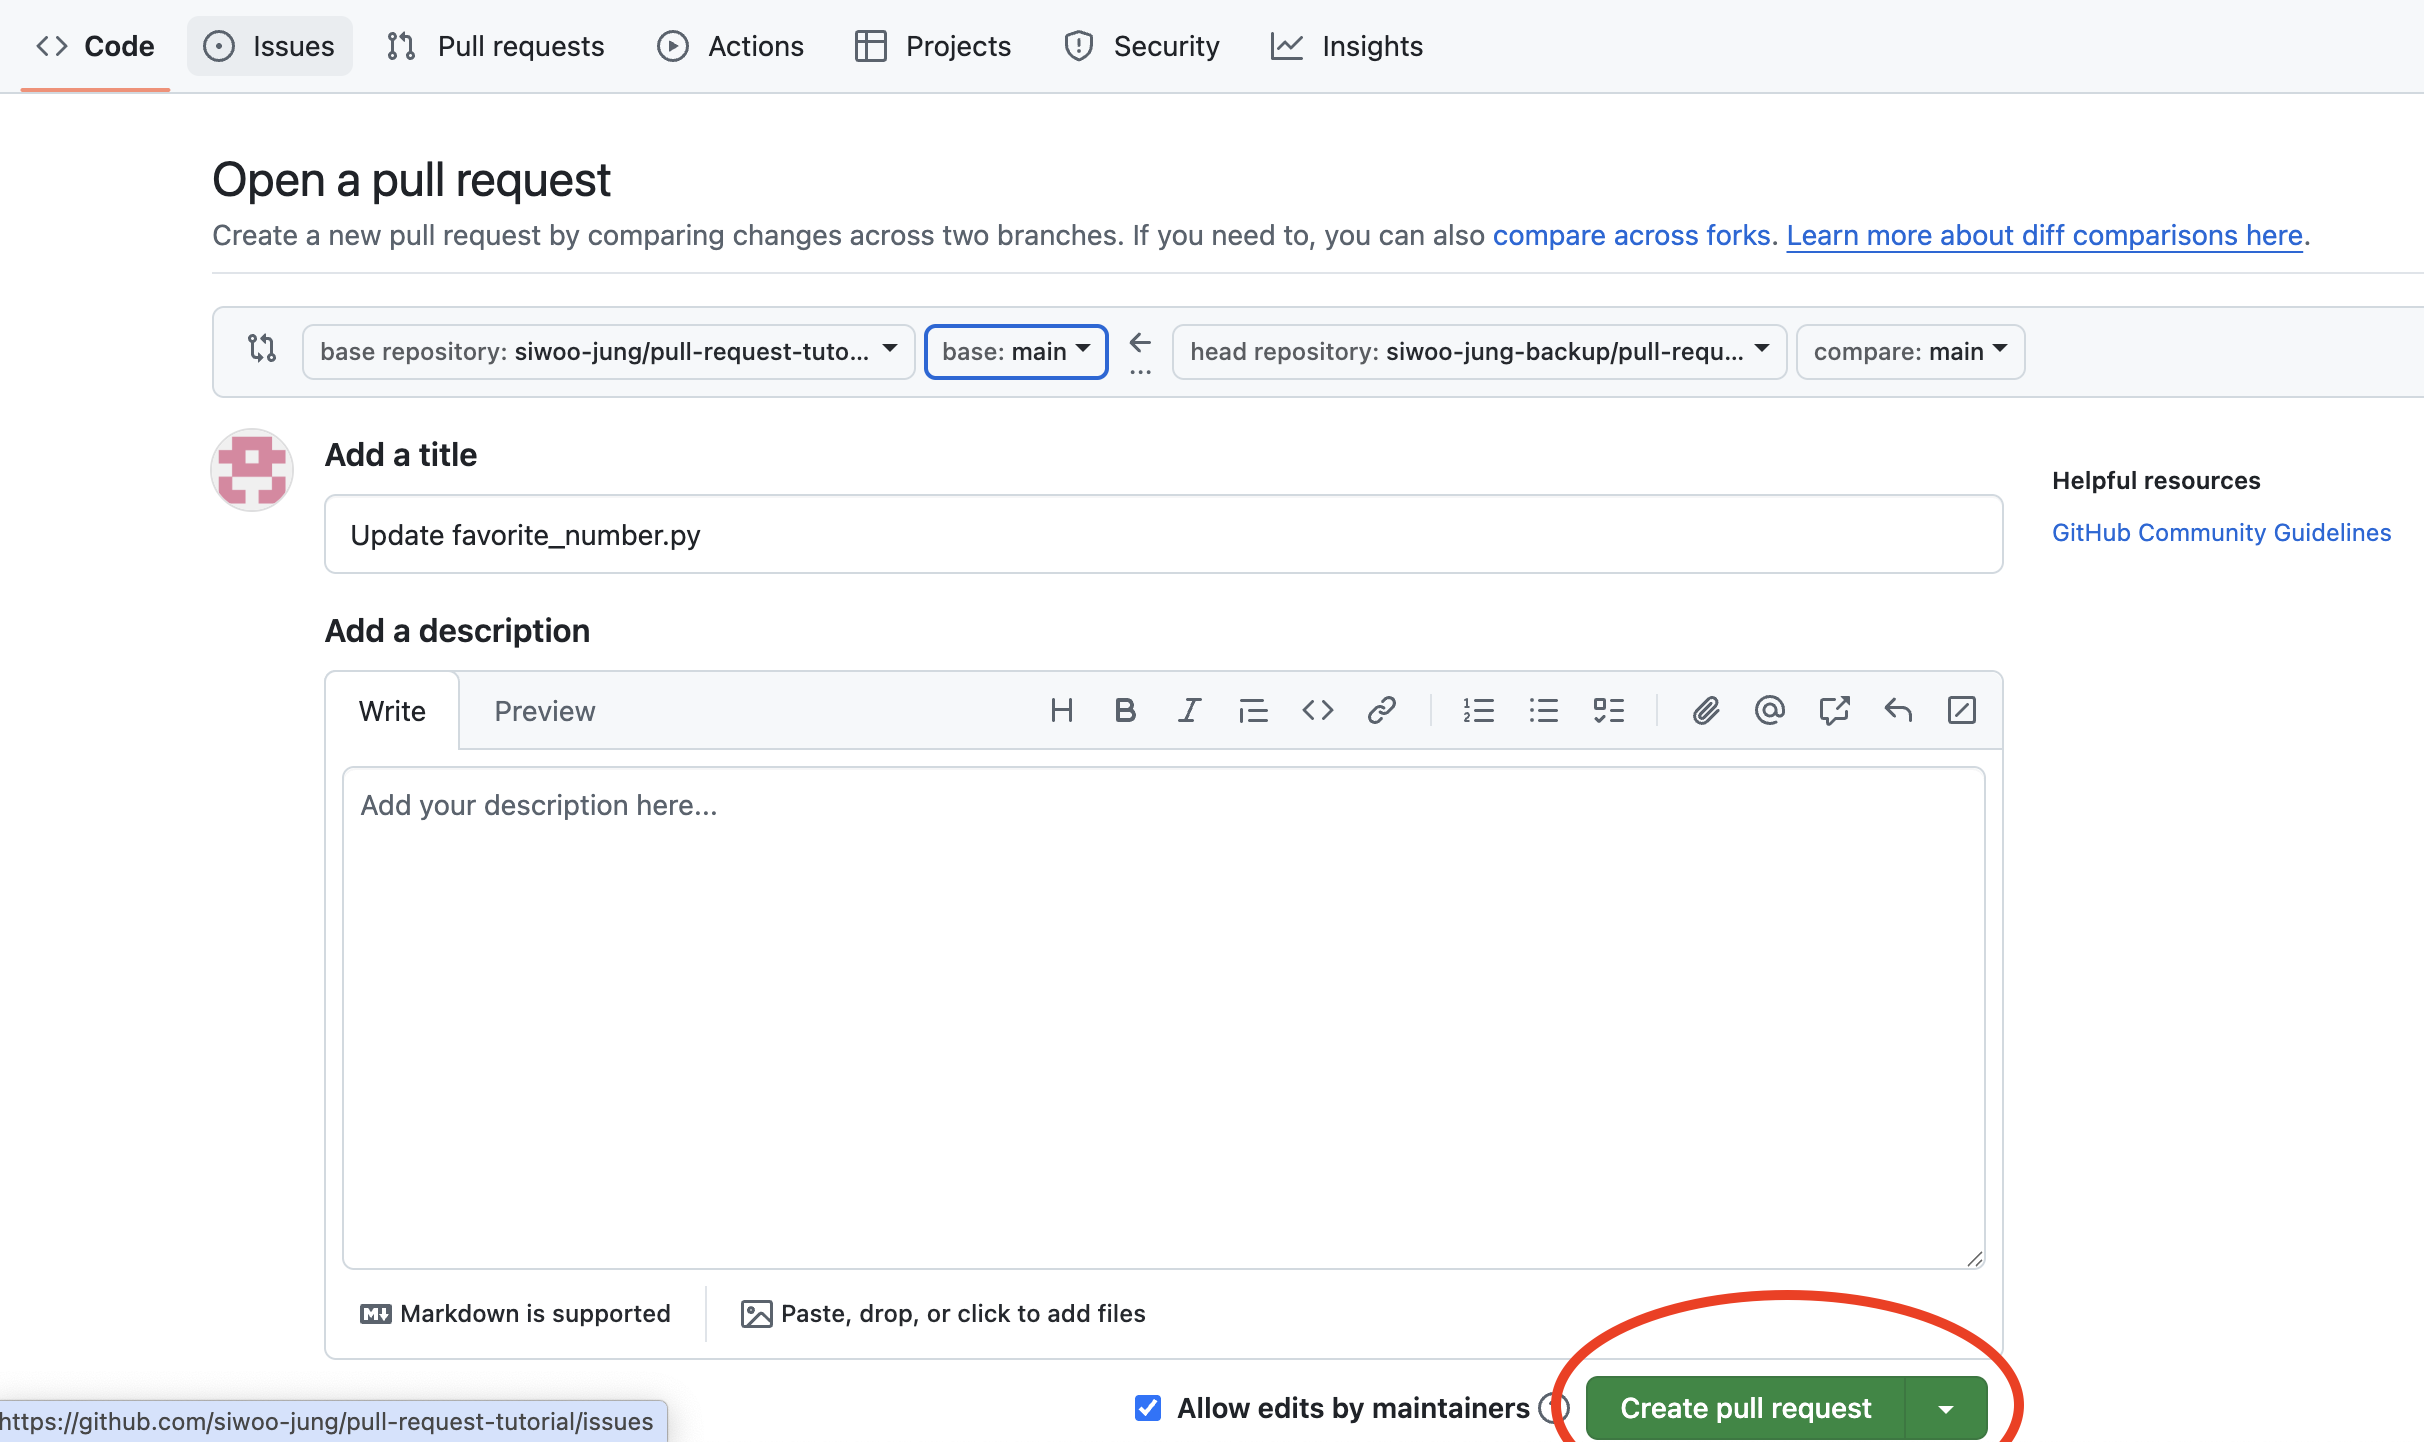
Step 7: Submit Your Pull Request
- Review your changes on the pull request page
Click Create pull request
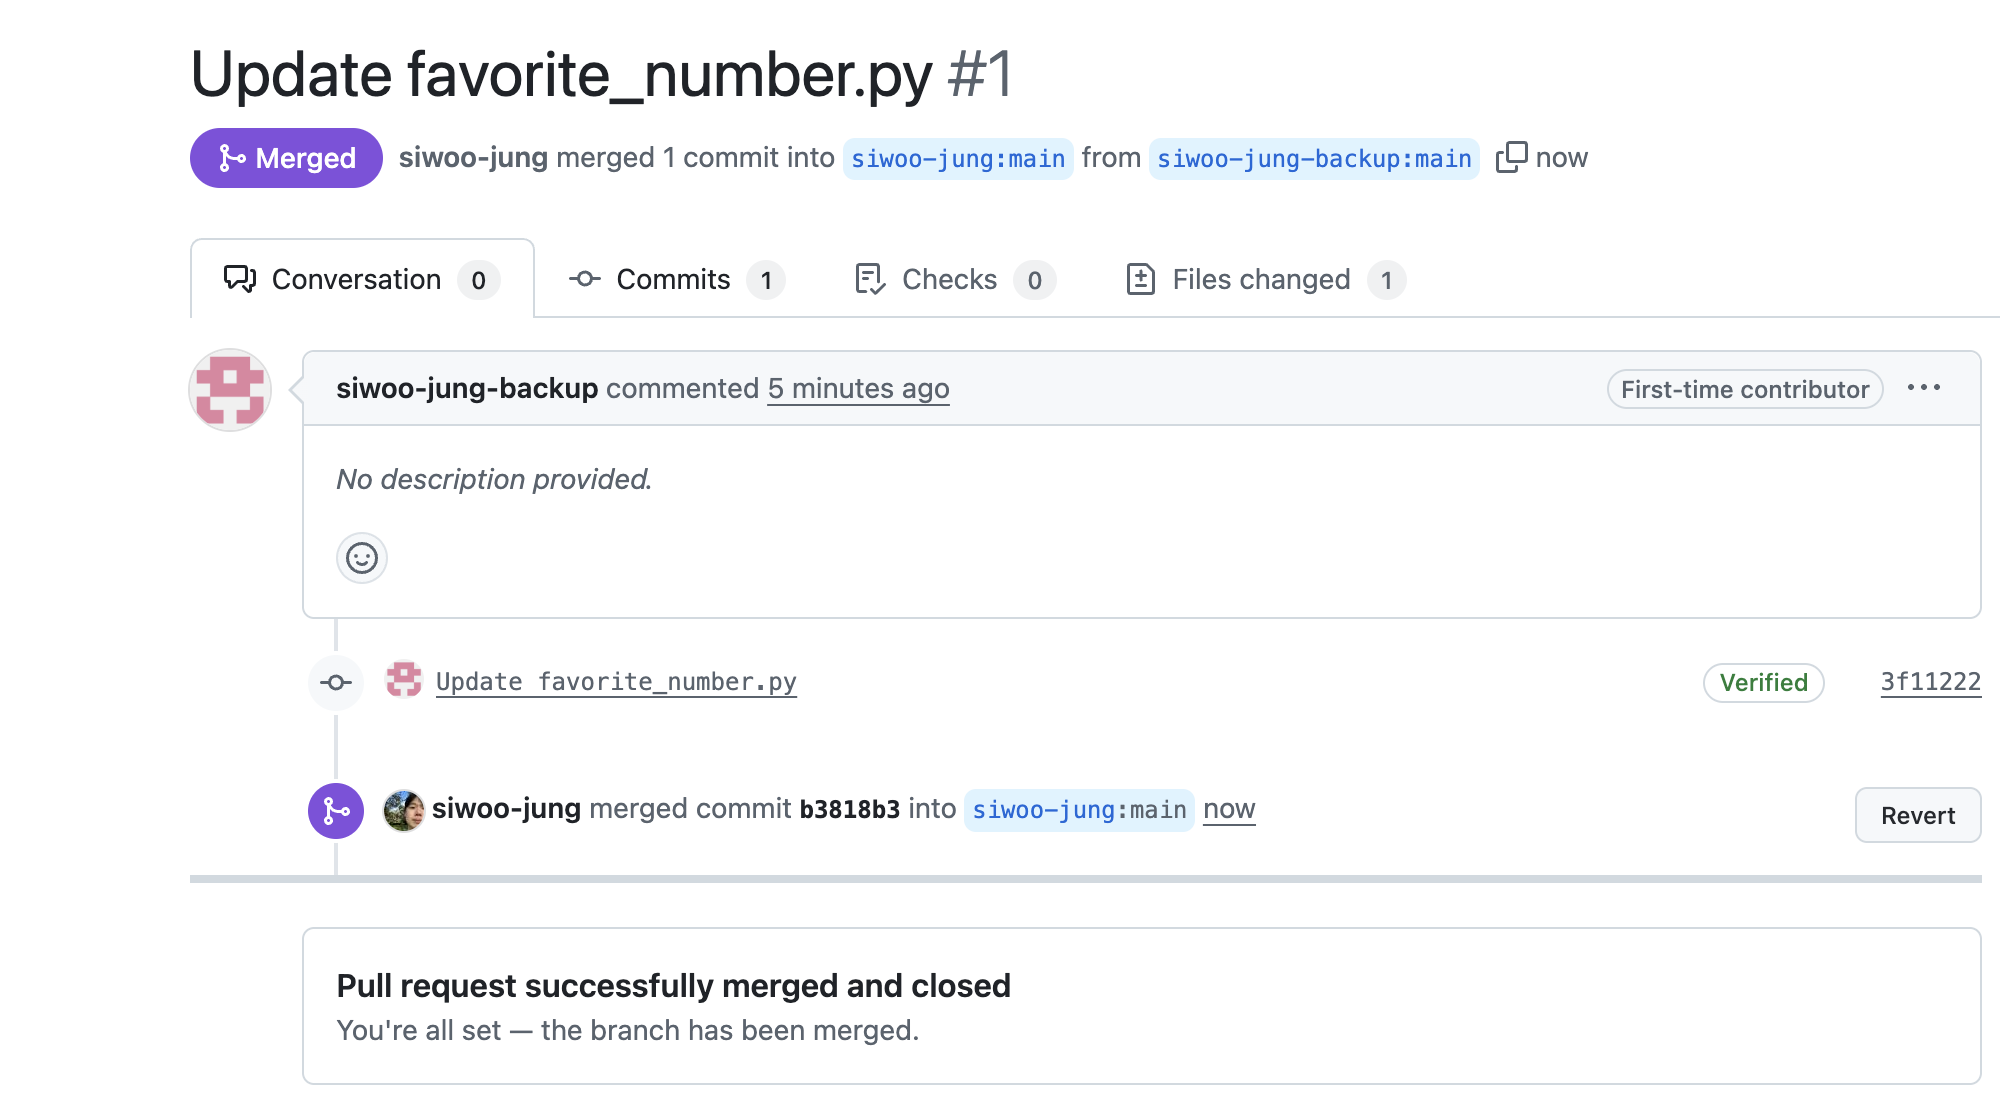
Step 8: Wait for Review
Once you submit your pull request, I will review it and merge it into the main branch!
Conclusion
When you create a PR on an actual open source project, the main process is no different. However, one thing you may want to prevent is automatic linters, such as prettier. These tools automatically format code whenever you save a file, which could cause significant changes (differences) in a file that you would not have expected.